By using SOLIDWORKS Plastics we can simulate the injection molding manufacturing process
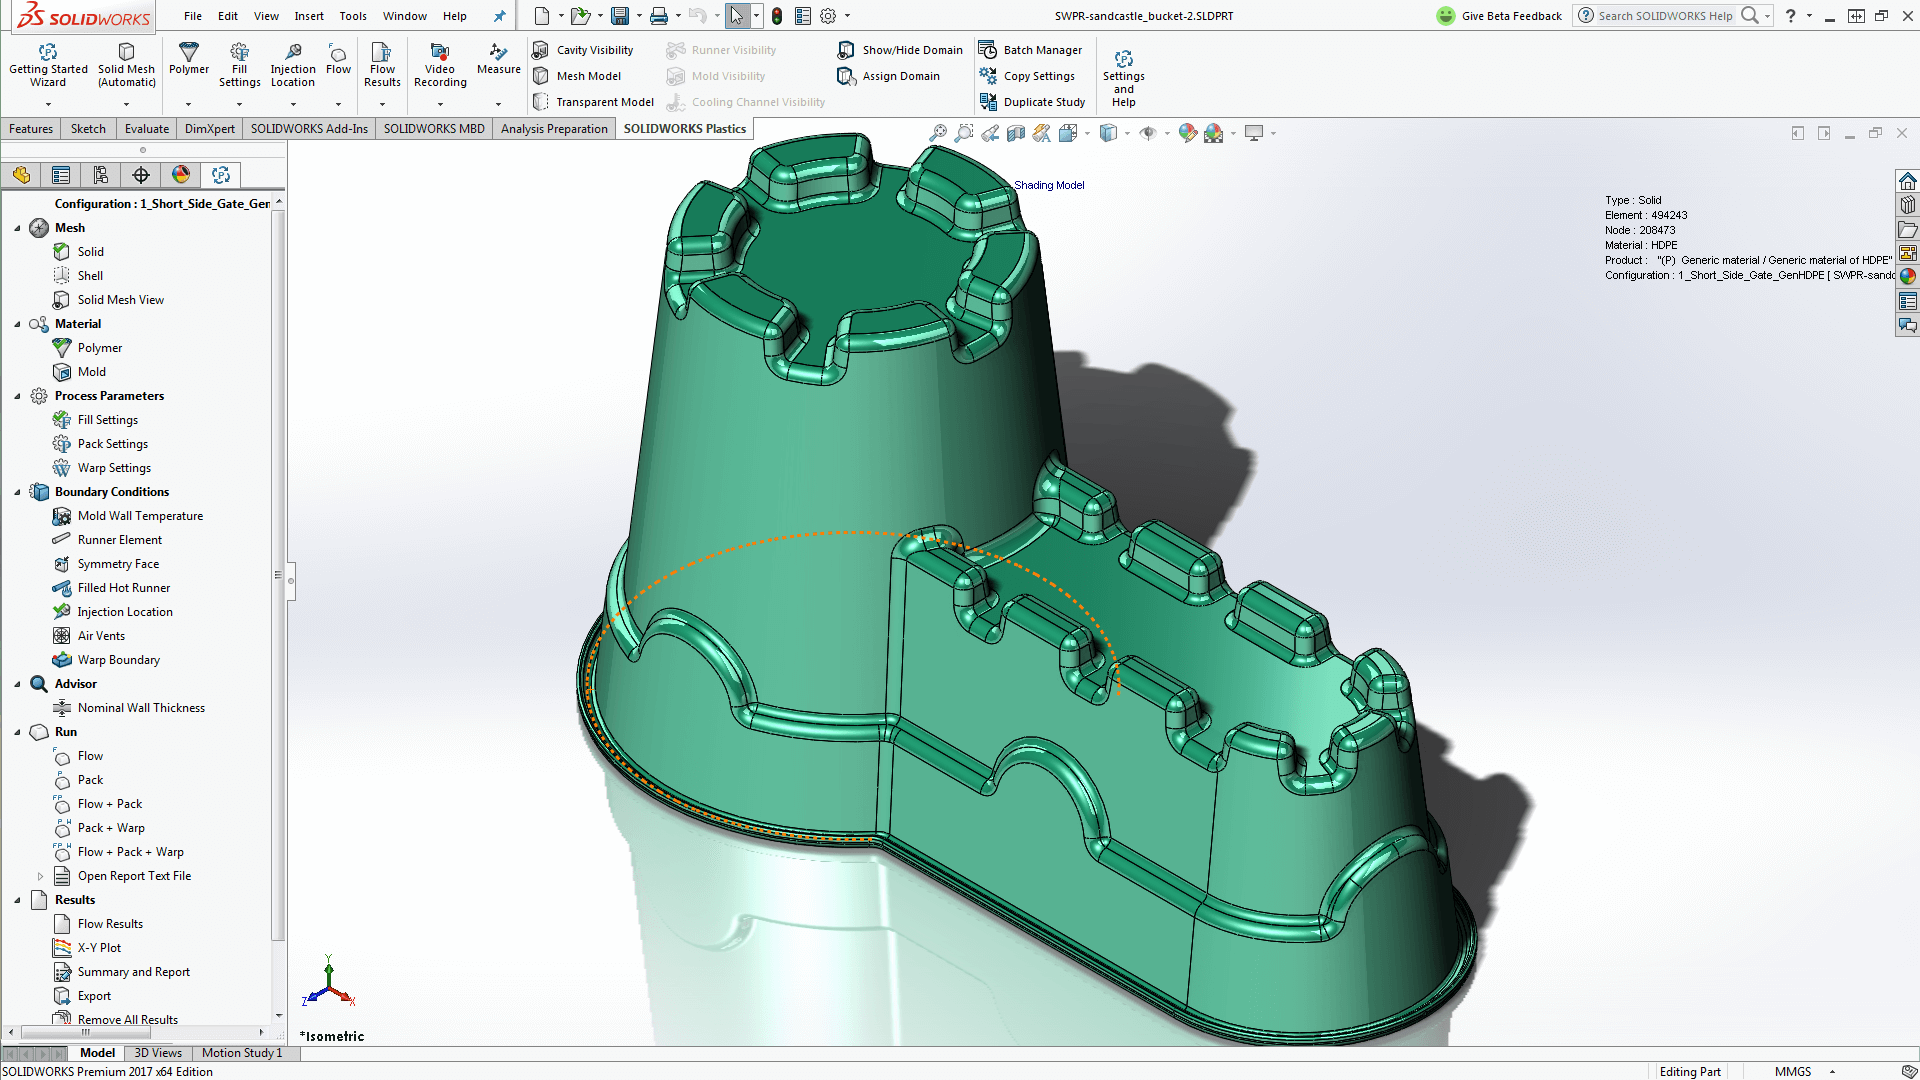
Well summer is just around the corner and my family is chomping at the bit to get down to the beach. Last weekend I cleared out the garage and dug out all our children’s beach gear, buckets, spades, and alike. Which got me thinking, could I a mechanical engineer with minimal plastics training, design a new sandcastle bucket that looks right and can be successfully manufactured? In order to keep the cost down, I decided that my sandcastle will be manufactured using the injection molding process. Creating the geometry in SOLIDWORKS is a breeze, a few extrudes, some patterns, fillets, a shell feature and I am good to go. Lastly, by running a draft analysis I know that the geometry can be ejected from the mold.
But as every engineer knows, the geometry is only half the story. The big questions are, can this part design be injection molded, and is the resulting part acceptable? By using SOLIDWORKS Plastics we can simulate the injection molding manufacturing process to ensure that not only is the part design moldable, and that the resulting part is fit for sale.
The first set of questions I need answered by SOLIDWORKS Plastics are “Is my part design capable of being injection molded, and where do I place my gate location?”. The least expensive form of injection molding uses a cold runner system with the gate located on the parting line. So I now have a new question, “Do I gate from the short side of the sandcastle, or gate from the tall side”? Doing this by trial and error after machining the mold is not an acceptable option, as it is far too expensive of a test procedure. By using SOLIDWORKS Plastics, I can run multiple analyses as my testing method and all it costs me is CPU time and not much else after that.
My first test has the gate located on the short side, shown by the green arrow in the image below. SOLIDWORKS Plastics reports a Fill Time of 9.5 seconds and required Injection Pressure of 74.2 MPa. This part design has a large part volume, so the lengthy fill time is reasonable and the injection pressure is well within most machine maximum injection pressure capabilities of 200 MPa. My first question regarding the moldability has been answered. Yes, my part design can be molded. Although, at first glance the results look good, there is an issue with my gate location on the short side. SOLIDWORKS Plastics predicts a large and visible Weld Line on the tall side of the part, shown below by the red arrows.
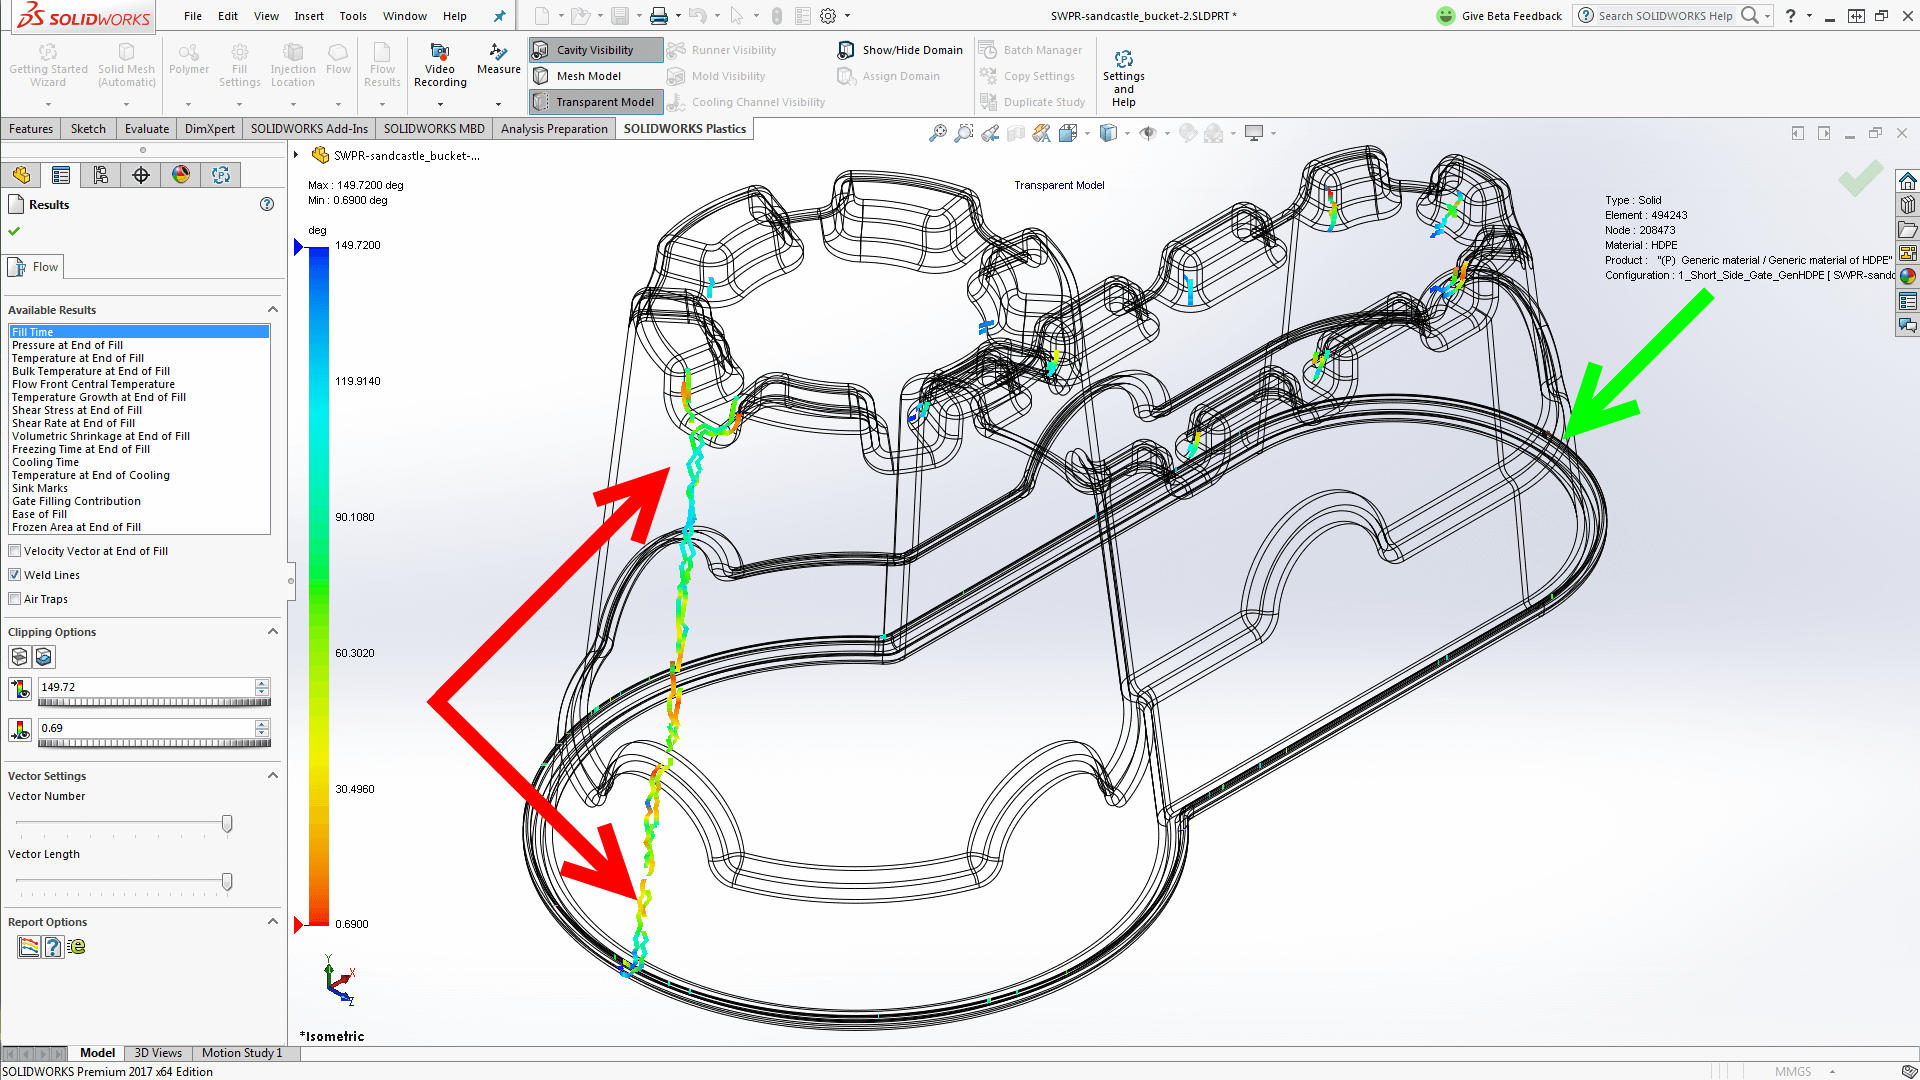
The reduction in structural integrity caused by the Weld Line is not my concern, as this is a beach toy and will not be supporting extensive loads. What does concern me is our company primarily uses metallic-flake colorant in our plastic materials, and metallic flake noticeably gathers along Weld Lines and is an aesthetic blemish on the molded part surface.
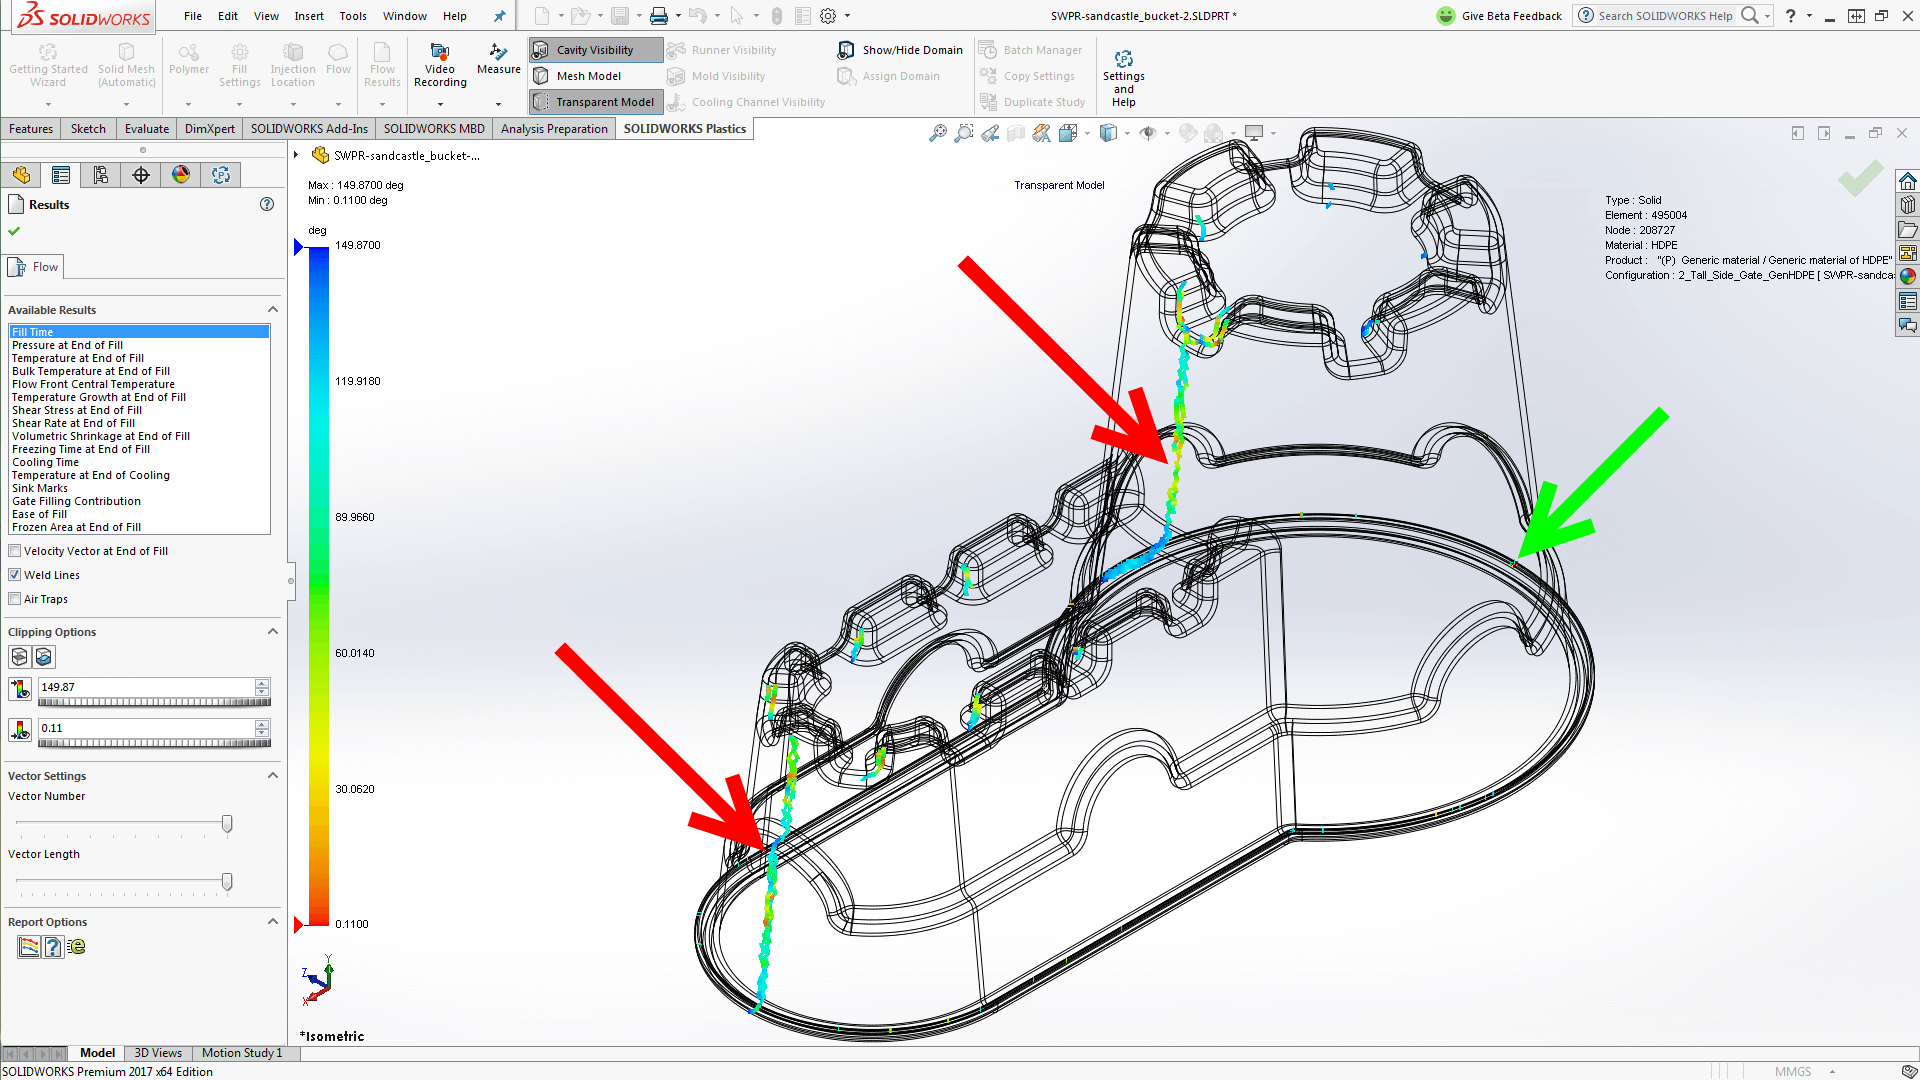
In my second analysis, I gated the part from the tall side of the sandcastle. The Fill Time and Injection pressures are similar, and now the Weld Line results show two weld lines in less noticeable locations. They are much smaller than original weld line and are spaced further apart. So gating from the tall side is my best option.
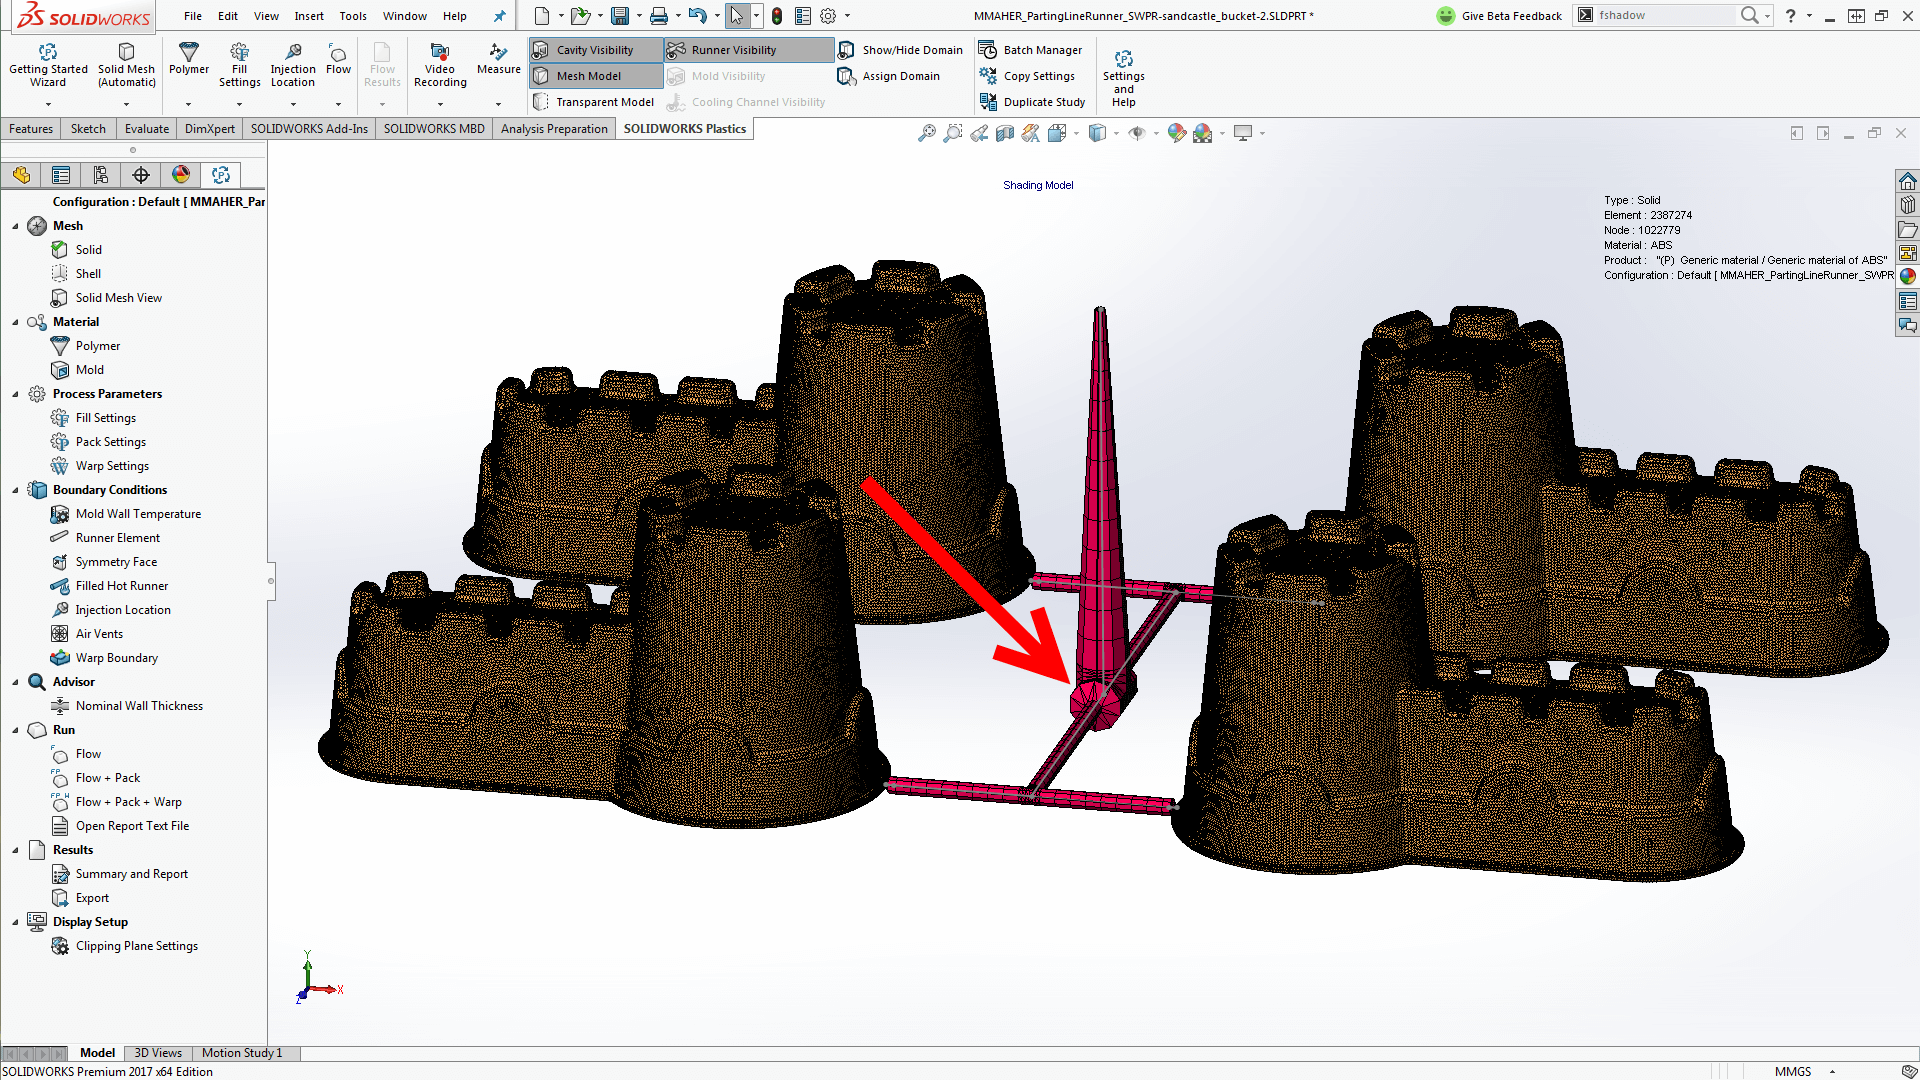
I now have the gate location squared away, what kind of runner design and mold design should I use for production? A quick chat with a friend suggests a four cavity layout with an “H-Type” runner system would be a good starting point. Once again using SOLIDWORKS Plastics, I can simulate the manufacturing process so I can validate the moldability of my part design. Now let’s make sure my “H-Type” runner design is my best option before cutting any metal and incurring unnecessary expenses.
Due to the height of the sandcastle design, using a sprue inlet diameter of 5.0 mm and a standard sprue draft angle of 3.0 degrees results in a sprue outlet diameter of 31 millimeters. The 31 mm diameter runner will take about seven minutes to cool down sufficiently to eject from the mold. Even I know a seven minute cycle time is no good for production. Once again SOLIDWORKS Plastics is guiding me towards a better manufacturing process for my part design. I make the decision to not use a parting line runner system for this mold layout.
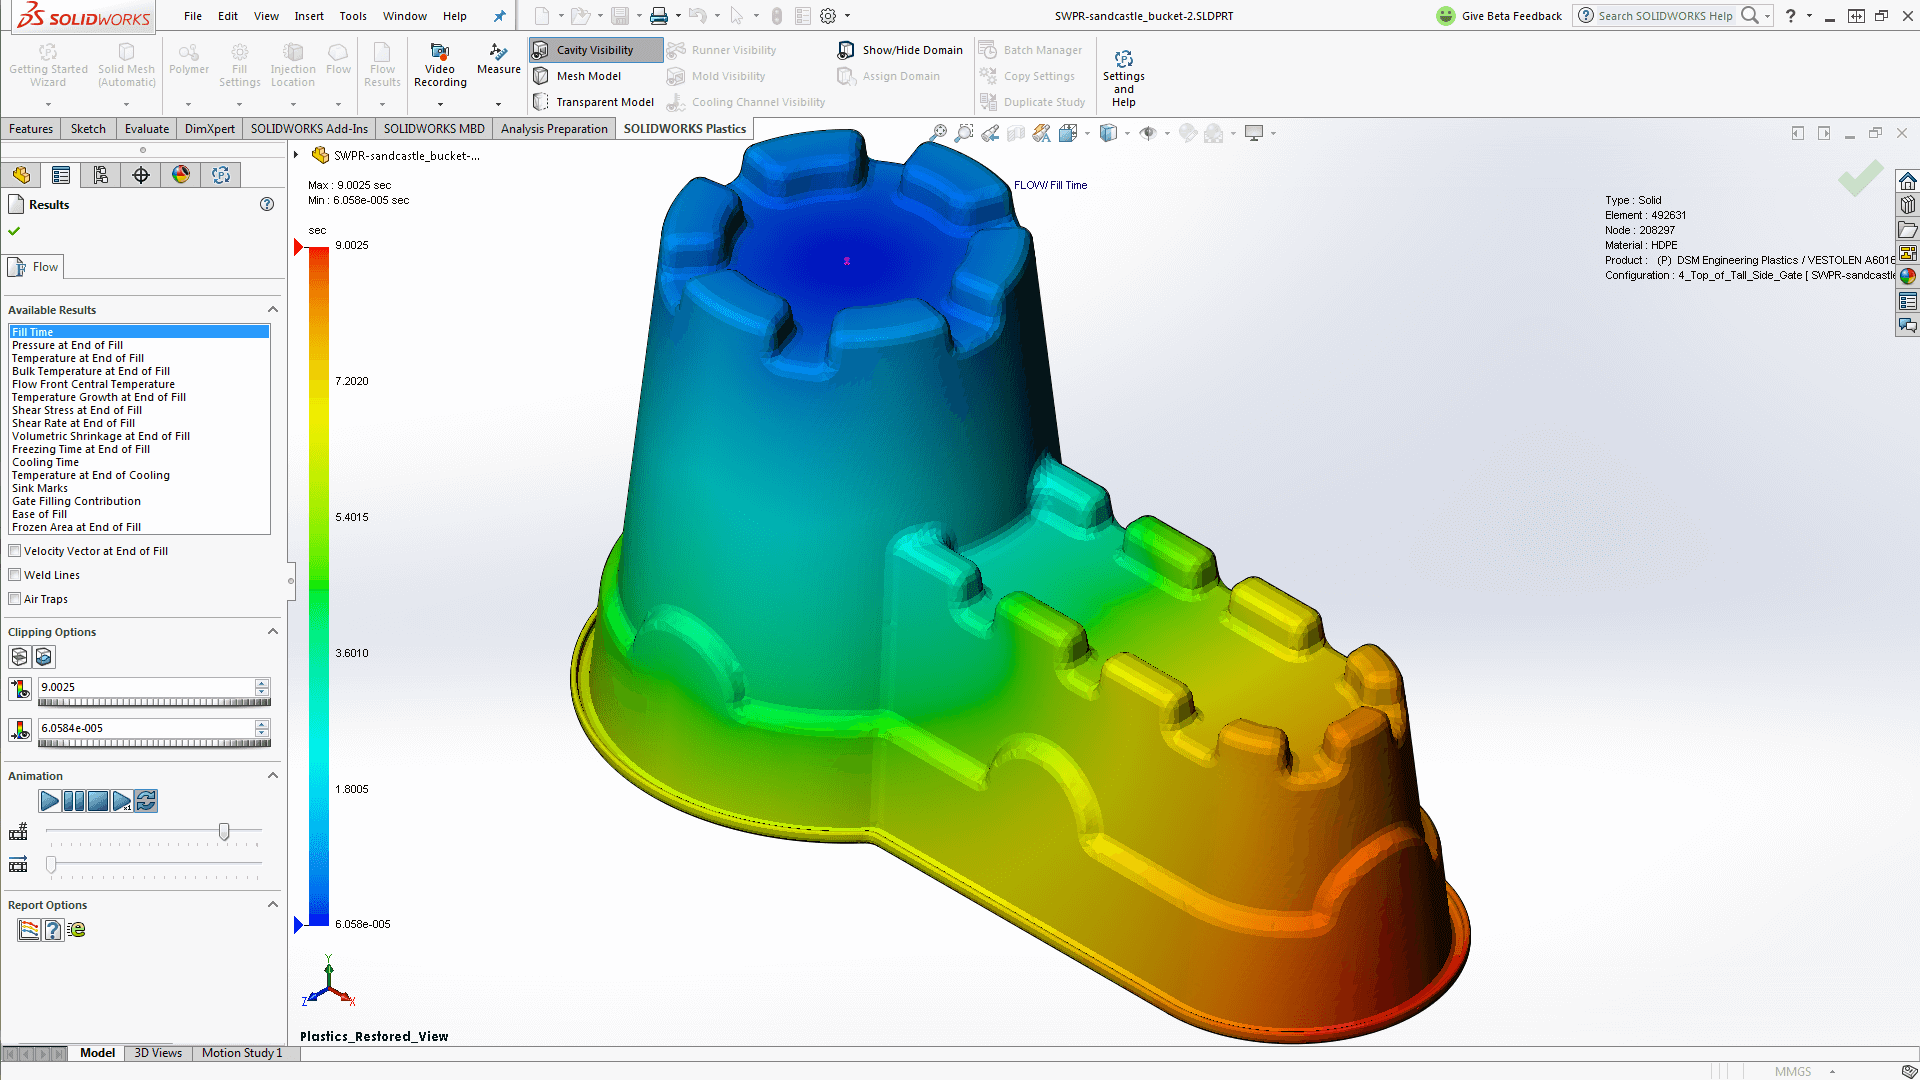
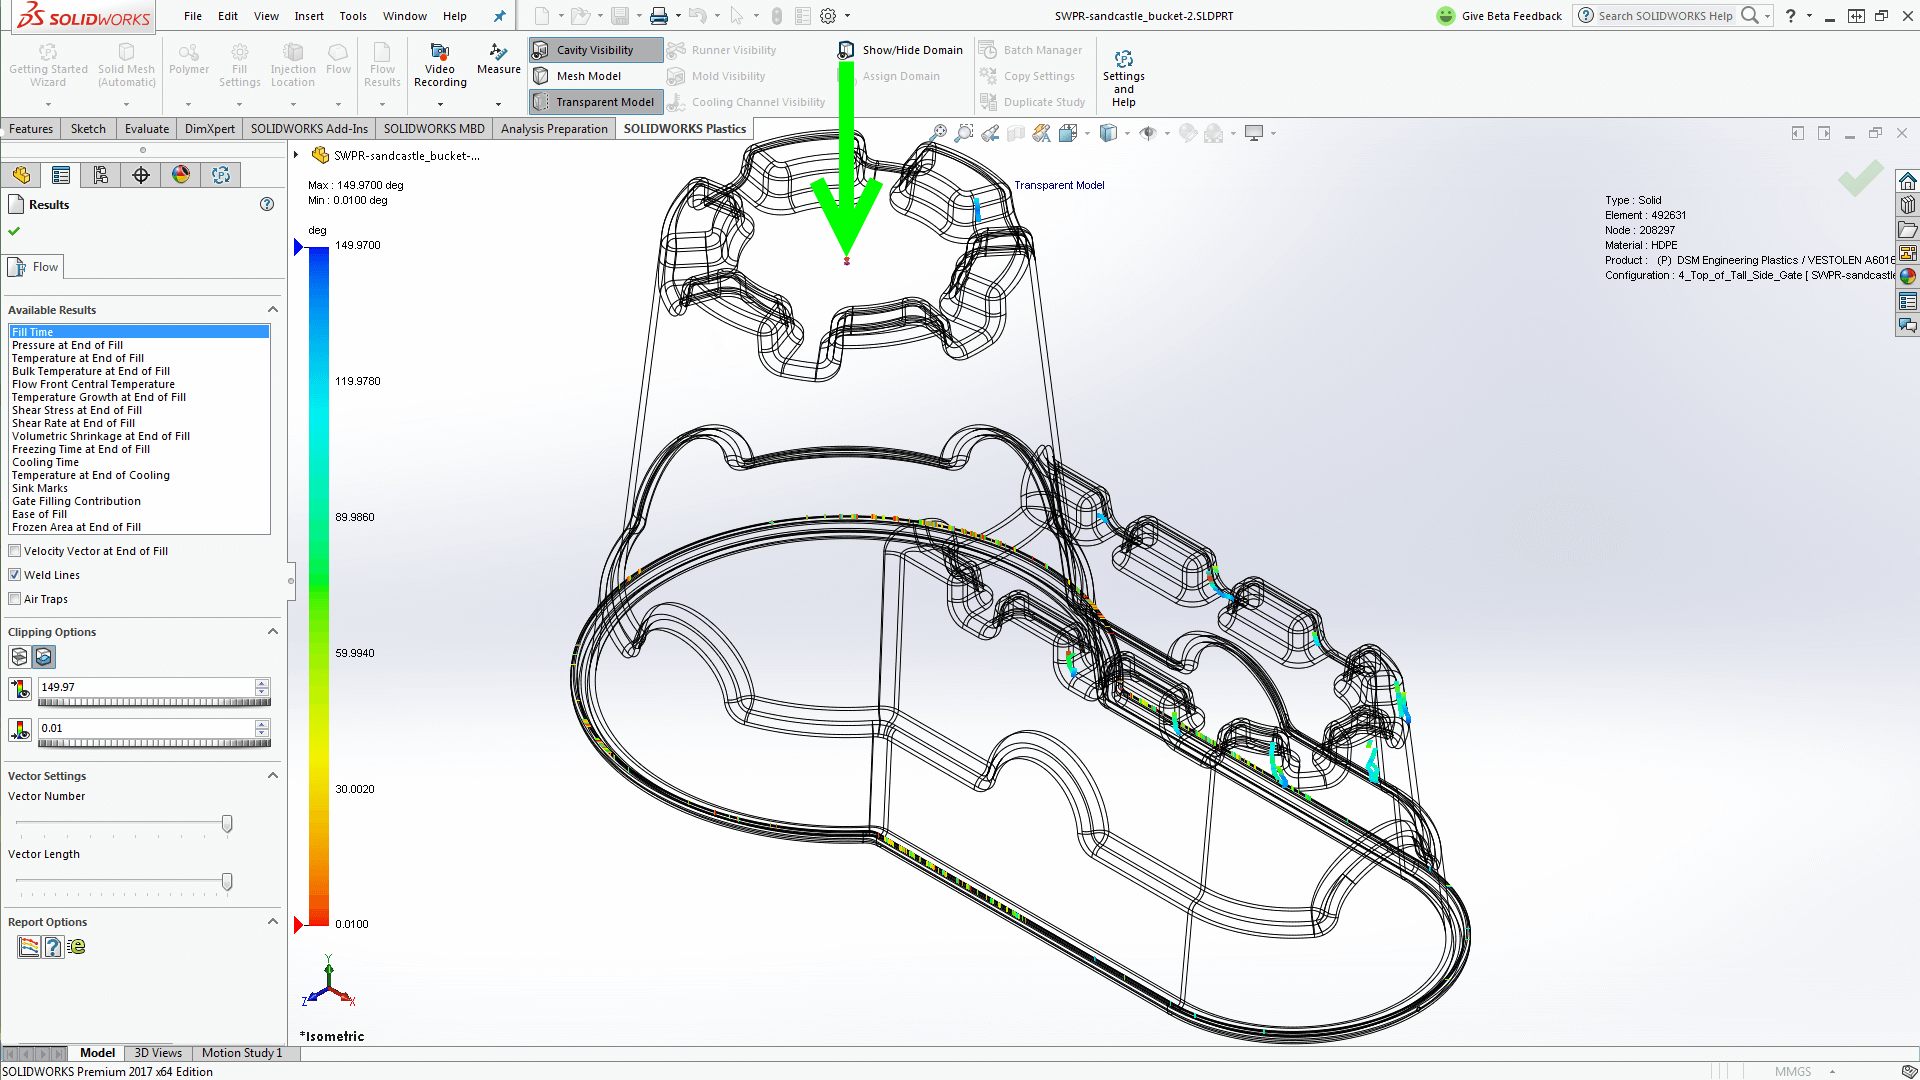
The first step to reduce the sprue height is to gate from the top of the sandcastle by using a “three plate, cold drop, center gate”. This is a similar approach to how 5 gallon buckets are injection molded, except those use a much more expensive hot runner system. The results from this center gate analysis shows that that there are no substantial weld lines to be seen when gated from the top face. Since the center gate on the top face is the optimal gate location, this will be the runner design used to injection mold the highest quality part, using the most cost effective design.
SOLIDWORKS Plastics
In plastic part design, the geometry is only half the story. SOLIDWORKS Plastics should be used throughout your design process to validate your part design, runner design, and mold design saving you both time and money.
